DIY Skincare
HOW TO MAKE HOMEMADE LOTION BARS

Aug
LEARN HOW TO MAKE HOMEMADE LOTION BARS USING SIMPLE, ALL-NATURAL INGREDIENTS. LOTION BARS WILL LEAVE YOUR LEAVE SKIN FEELING SOFT AND HEALTHY.

This post contains affiliate links, which means I make a small commission at no extra cost to you. See my full disclosure here.
WHAT ARE LOTION BARS?

Lotion bars are exactly as they sound, a bar of lotion as opposed to a bar of soap! Beeswax is added to a mixture of all-natural, nourishing ingredients making for a firm body lotion that is molded into the desired shape. Lotion bars will remain solid until heated up by your body heat, but care should be taken to store lotion bars in a cool place in your home during the summer.
Homemade lotion bars can be made with a few, simple ingredients in relatively little time. When you’re not using the lotion bars for yourself, they make for great gifts as they are eco-friendly, and handmade. These are a nice addition to leave in the guest bath, or guest room for when visitors are in town.
SIMPLE, ALL-NATURAL INGREDIENTS

Coconut Oil: We use coconut oil for just about everything around our farmhouse, from cooking to DIY skincare. Coconut oil is a healthy way to hydrate skin naturally, and many DIY skincare recipes call for coconut oil so it’s a good item to have on hand. Absorbing nicely into skin, this versatile product nourishes and softens even the driest of skin.
Shea Butter: Shea butter is another great, all-natural ingredient to have in the pantry when you begin your homemade skincare journey. Known for softening skin, soothing skin and reducing inflammation, shea butter has many beneficial qualities.
Beeswax: It doesn’t get any more all-natural than beeswax! Aside from it’s natural properties, beeswax contains anti-inflammatory properties and helps to form a protective barrier on the skin. Our skin has it’s own natural moisture barrier, which can become weakened during the cooler months and with lots of hand washing. The moisture barrier is what keeps our skin soft and healthy, so it’s very important to moisturize appropriately.
INGREDIENTS AND TOOLS NEEDED TO MAKE HOMEMADE LOTION BARS


This post contains affiliate links, which means I make a small commission at no extra cost to you. See my full disclosure here.
I’ll admit, several years ago when I first ventured into the world of creating DIY skincare products at home, I was completely stumped on where to purchase the ingredients needed. In the list below, I’ve linked some of the products I purchased and have used over and over in my homemade skincare routine.
- Coconut Oil (2/3 C)
- Shea Butter (2/3 C)
- Beeswax (2/3 C)
- Pan
- Large mixing bowl
- Baking sheet
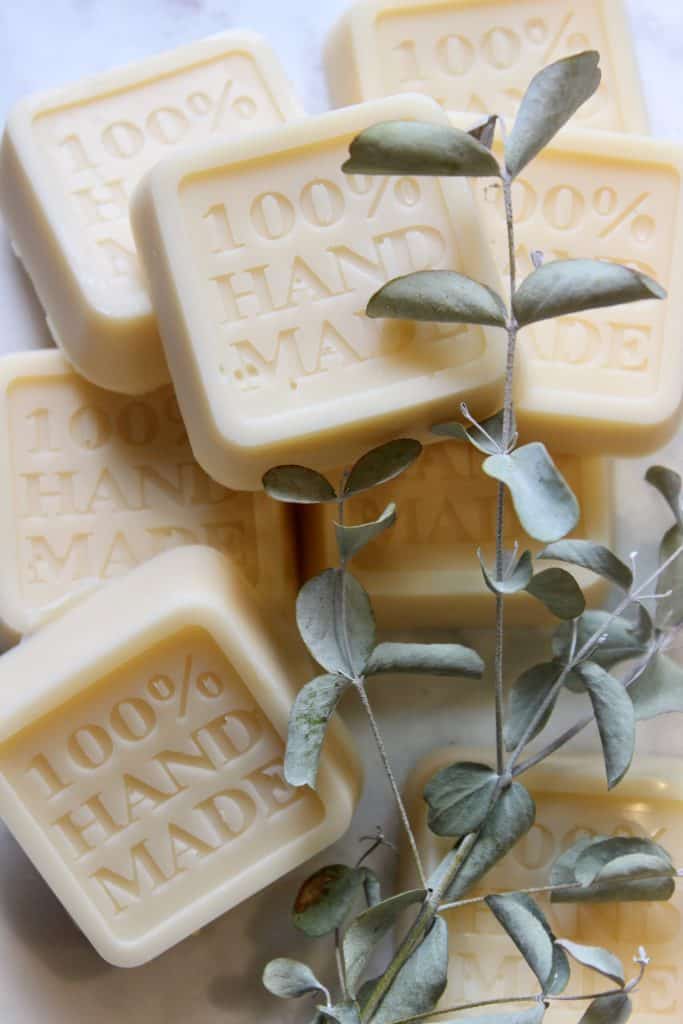
- Molds: I purchased these silicone molds several years ago, and love how they say “100% Handmade”. The lotion bar recipe works very well in these molds without sticking.
- Essential Oils: For this recipe, you will need about 20 drops of the essential oil of your choosing. The lotion bars pictured here were eucalyptus scented, and we love how they turned out.
HOW TO MAKE IT

First, you will need to set up a double-boiler. Bring a medium sized saucepan of water to a boil on your stovetop, and place another bowl inside to create your double-boiler.
Add coconut oil, shea butter, beeswax and stir. It can take about 15-20 minutes for the beeswax to fully melt, so stir occasionally and keep an eye on the mixture. Once melted, the liquid will become a clear amber color.

Next, add about 20 drops of the desired essential oil(s) to the liquid.
Set up a baking sheet with the molds you wish to fill for the homemade lotion bars. I like to line the baking sheet with parchment paper to make for a speedy clean-up. Set the silicone molds on the baking sheet, and carefully ladel the liquid lotion into each silicone mold. Please use an abundance of caution as not to burn yourself.

Once the molds are full, let them sit on your countertop until cool and then transfer to the refrigerator. This is where the baking sheet really comes in handy!

The lotion bars can be removed from their molds once cooled, which will probably take several hours. I often leave them in the refrigerator overnight, and pop them out of their molds the following day.
HOW TO USE HOMEMADE LOTION BARS
These convenient lotion bars can be used the same as traditional lotion. Once in contact with skin, the bars will soften and the product will easily smooth onto skin.
Because homemade lotion bars soften when warm, care should be taken when storing them in the home during the warmer months. Our farmhouse can become quite hot, especially the rooms on our second floor, so I store extra lotion bars in a glass container in my refrigerator until they are ready to be used.
PRINTABLE RECIPE CARD

HOMEMADE LOTION BARS
Learn how to make homemade lotion bars using simple, all-natural ingredients. Lotion bars will leave your leave skin feeling soft and healthy.
INGREDIENTS
- 2/3 C coconut oil
- 2/3 C shea butter
- 2/3 C beeswax
INSTRUCTIONS
First, you will need to set up a double-boiler. Bring a medium sized saucepan of water to a boil on your stovetop, and place another bowl inside to create your double-boiler.
Add coconut oil, shea butter, beeswax and stir. It can take about 15-20 minutes for the beeswax to fully melt, so stir occasionally and keep an eye on the mixture. Once melted, the liquid will become a clear amber color.
Next, add about 20 drops of the desired essential oil(s) to the liquid.
Set up a baking sheet with the molds you wish to fill for the homemade lotion bars. I like to line the baking sheet with parchment paper to make for a speedy clean-up. Set the silicone molds on the baking sheet, and carefully ladel the liquid lotion into each silicone mold. Please use an abundance of caution as not to burn yourself.
Once the molds are full, let them sit on your countertop until cool and then transfer to the refrigerator. This is where the baking sheet really comes in handy!
The lotion bars can be removed from their molds once cooled, which will probably take several hours. I often leave them in the refrigerator overnight, and pop them out of their molds the following day.
PIN IT FOR LATER


YOU MAY ALSO LIKE
If you’re like me, and you love creating your own homemade skincare products, check out these recipes from our farmhouse!
- Lemon sugar body scrub
- The perfect body scrubs for fall
- Homemade Shaving Cream with Aloe Vera
- How to Make Homemade Hand Sanitizer
- Whipped Body Butter (homemade, all-natural)
- DIY Shower Steamer Recipe without Citric Acid
SHOW OFF YOUR CREATIONS!
If you make a batch of these homemade lotion bars, I would love to see! Please tag us on Facebook @SimplyRootedFarmhouse or Instagram @OurSimplyRootedFarmhouse.
Linked to: Shabby Art Boutique, Create With Joy, My Wee Abode Tuesday Turnabout, 15 Acre Homestead Farm Fresh Blog Hop, Let’s Add Sprinkles, Zucchini Sisters Celebrate your story, Follow The Yellow Brick Home, The Inspired Prairie: Embracing Home & Family, Ducks ‘n a Row: Wonderful Wednesday Blog Hop, Modern on Monticello: Home Matters Linky Party, Oak Hill Homestead: Simple Homestead blog hop, Simple Life Mom: Homestead Blog Hop